Get some 2×4 studs and cut 4 pieces to 3 feet long. These are your corner posts.
Get some cedar boards from Home Depot/Lowe’s. Get 8 boards that are 8 feet long and cut all of them in half to make 16 boards that are each 4 feet long. These are your sides.
Connect your 4 studs by screwing in cedar boards around the bottom of them. So you’ll have 4 studs running vertically as corner posts and 4 cedar boards forming a square around the bottom of the corner posts.
Do the same thing around the top of the studs – 4 cedar boards forming a square around the top.
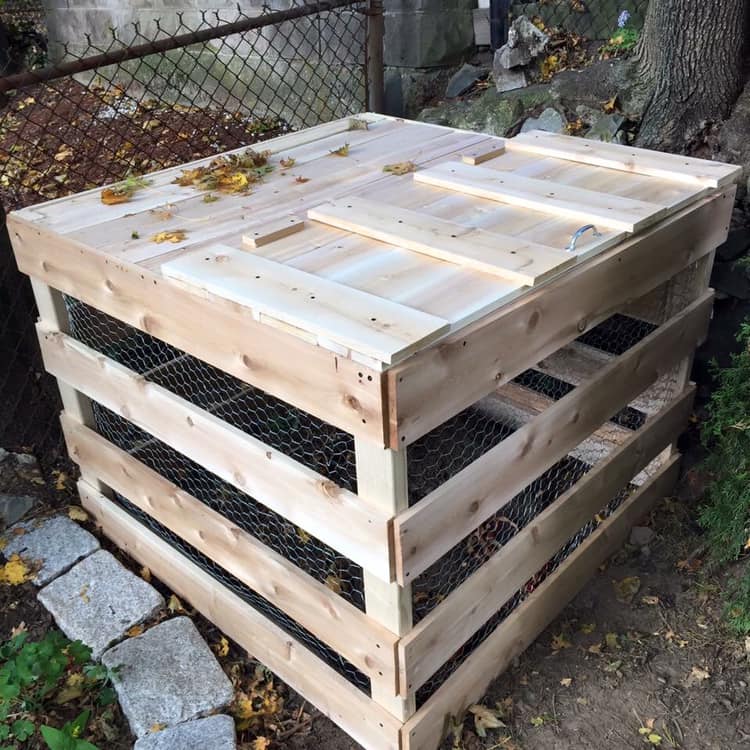
Notice in the photo that there are gaps between the side boards. This is for ventilation. So, attach your remaining side boards spaced out, leaving gaps. There is no need to be precise with the spacing (just eyeball it), but if you line the boards up with each other as you go, you can make sure your squares are straight.
Once all of your side boards are on, simply staple some chicken wire around the inside of the walls. This keeps the compost in, but allows air to circulate.
Now it’s ready! You can either buy some more boards to make a lid, like I did, or just throw a tarp over it! I find 3 feet to be a good height for removing finished compost, but some folks like to make one side a bit lower for better accessibility. It’s up to you, but hopefully this gives you some guidance.
One last tip — if you prefer something a bit smaller, consider getting 6 foot cedar boards instead of 8 foot. Cut them in half, and this will make your compost bin 3×3 feet, instead of 4×4 feet.
Hope this helps!
